Our Hanging System
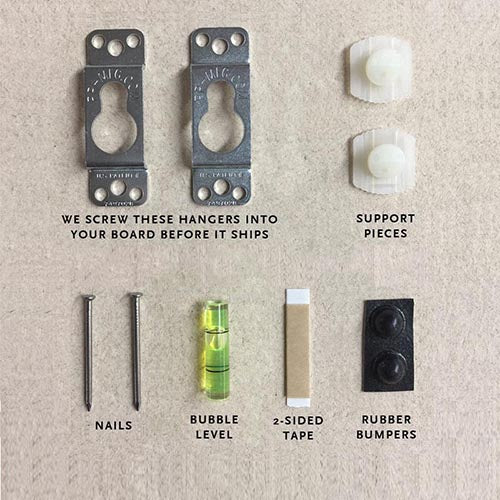
Install your board evenly and securely in 4 easy steps. Every board ships with the keyhole brackets already screwed into the back of your board and everything is included.
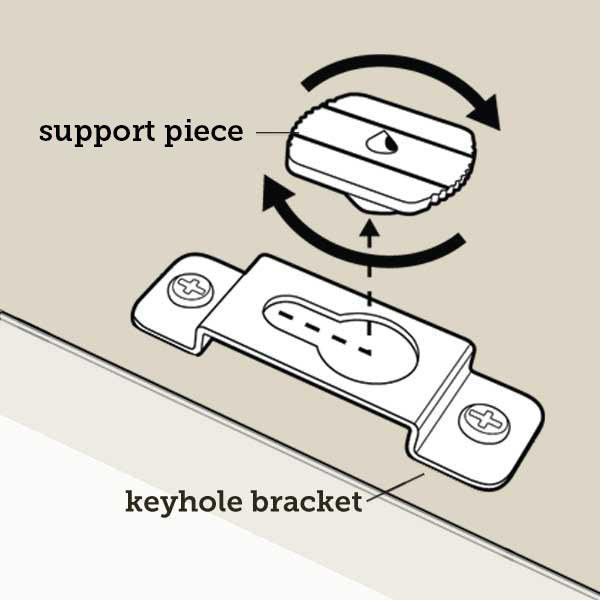
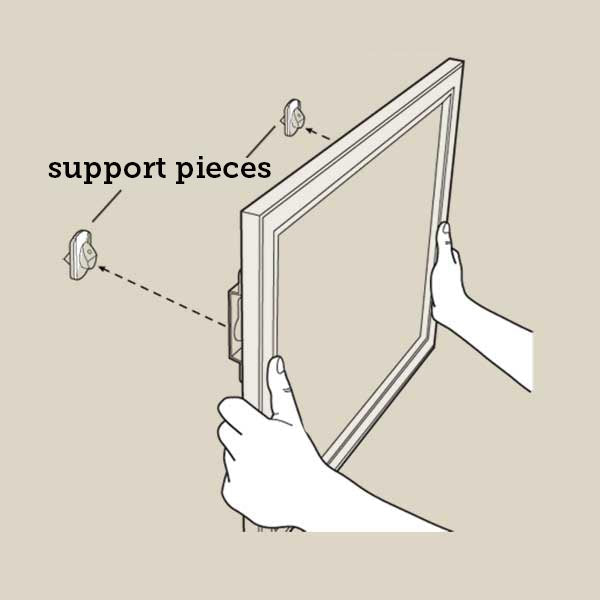
Step 1
Insert support piece into keyhole bracket on back of board. Twist and lock into position. Position board on wall and press firmly to create a dimple mark on your wall. Remove support piece from keyhole bracket.
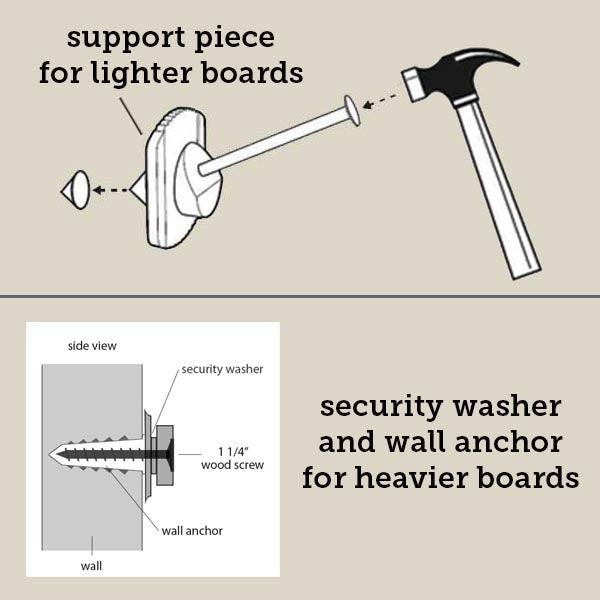
Step 2
Insert supplied nail into support piece and nail into wall where you made the mark in step 1. For larger/heavier boards we supply wall anchors, screws and a security washer (as shown) that will fit into the keyhole bracket.
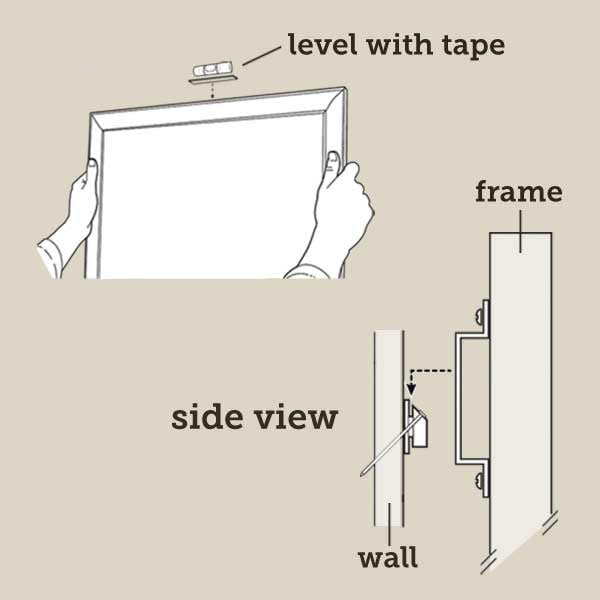
Step 3
Lock 2nd support piece into left keyhole bracket. Attach bubble level to top edge of frame with double sided tape. Position board on wall and fit keyhole bracket over nailed support piece. Adjust level of board and press right side into wall to mark. Remove board from wall and remove support piece from bracket.
Step 4
Repeat step 2 with 2nd support piece and nail into mark on wall. Install your board by pushing in and pulling down to lock your board into place. Apply included bumpers or double stick foam tape to secure bottom corners.
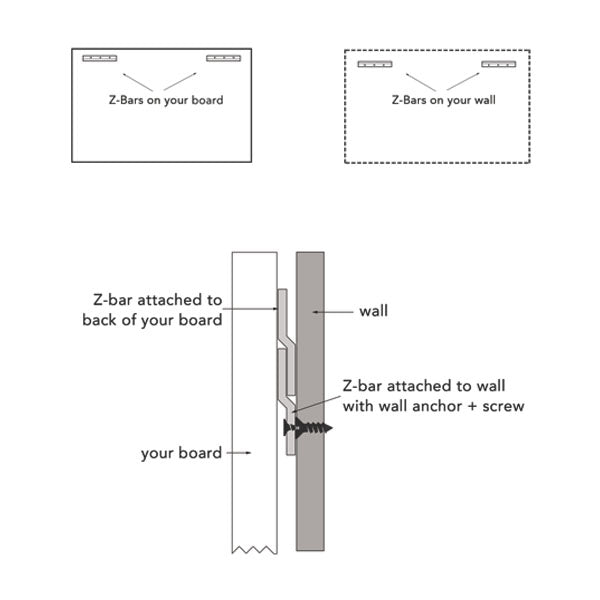
Z - Bars
On extra large or extra heavy boards we include our Z-Bar hanging system.